
Trying a new skincare product is exciting, especially when it’s something as nourishing as a natural tallow and honey balm. However, even the gentlest, most natural ingredients can occasionally cause a reaction in certain skin types. That’s exactly why a skincare patch test matters — and thankfully, it takes less than five minutes to do properly.
Here’s a complete walkthrough of why patch testing matters, and exactly how to do one correctly.
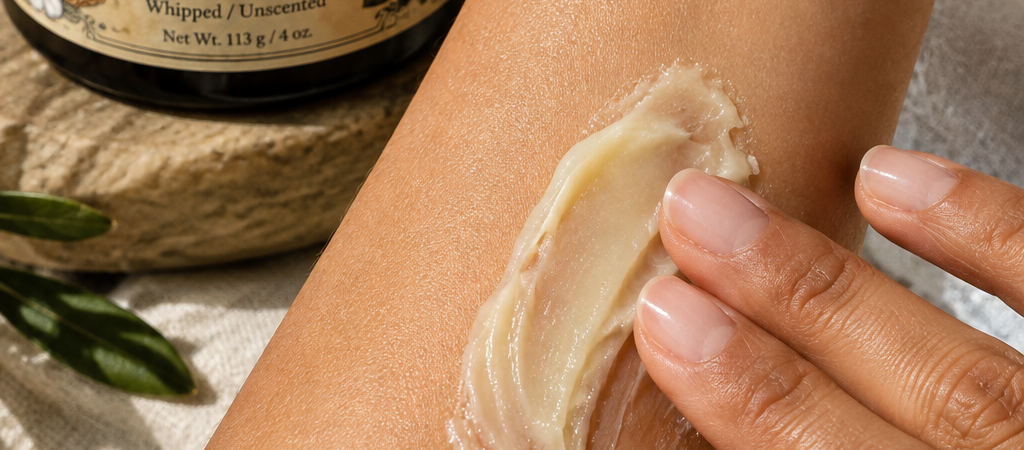
[Featured image suggestion: close-up of balm being applied to the inner forearm. Alt text: “skincare patch test on inner arm”]
What Is a Patch Test, and Why Does It Matter?
A patch test is a simple, low-risk way to check how your skin reacts to a new product before applying it more broadly — especially to your face. Even with natural, minimally processed ingredients like tallow, manuka honey, or jojoba oil, individual skin sensitivity varies. Someone might have a mild reaction to raw honey, for example, without ever having a known bee allergy.
Rather than discovering a reaction on your face after a full application, a patch test lets you catch it early, on a small, easy-to-manage area first.
Who Should Always Patch Test?
While patch testing is a smart habit for everyone trying a new product, it’s especially important if you:
- Have a history of sensitive, reactive, or easily irritated skin
- Have known allergies, particularly to bee products, nuts, or specific plant extracts
- Are trying a new brand or formulation for the first time
- Are using a product with active or concentrated natural ingredients, like raw manuka honey
How to Do a Skincare Patch Test, Step by Step
Step 1: Choose Your Test Spot
The inner forearm is the most common patch test location, since the skin there is thin and sensitive enough to reveal a reaction, but not as visible or delicate as facial skin. Some people prefer behind the ear as an alternative.
Step 2: Cleanse the Area
Wash the chosen spot with mild soap and water, then pat it completely dry. This removes any oils, lotion, or residue that could interfere with the test.
Step 3: Apply a Small Amount
Apply a small amount of the product — about the size of a pea, or even less — to the clean, dry area. Avoid rubbing it in aggressively; a light, even application is enough.
Step 4: Leave It Undisturbed
Let the product sit on the skin without washing it off for at least 24 hours. Avoid covering the area with clothing that might rub against it excessively during this period.
Step 5: Check for Reactions
After 24 hours, examine the area carefully for any of the following:
- Redness or unusual flushing
- Itching, burning, or stinging
- Swelling
- Small bumps or hives
- Persistent discomfort
If none of these appear, the product is very likely safe for broader use on your face or body.
Step 6: Wait a Full 24-48 Hours Before Full Use
Some reactions take longer than a few hours to appear, which is why patience matters here. If your skin still looks and feels normal after a full 24-48 hour window, you can move forward with confidence.
What to Do If You React
If you notice any redness, itching, or irritation during your patch test:
- Wash the area gently with mild soap and water.
- Avoid using the product anywhere else on your body.
- Apply a simple, fragrance-free moisturizer to soothe the area if needed.
- Consult a dermatologist if the reaction is severe, persistent, or doesn’t resolve within a day or two.
A patch test reaction doesn’t necessarily mean something is wrong with the product itself — it simply means your particular skin doesn’t tolerate one of the ingredients well, which is exactly the kind of information a patch test is designed to reveal safely.
A Few Patch Testing Myths, Cleared Up
“Natural products don’t need patch testing.” Not true. Natural ingredients can still trigger reactions in sensitive individuals — sometimes more unpredictably than heavily tested synthetic formulas, simply because natural ingredients vary batch to batch.
“If I’ve used similar products before, I don’t need to test a new one.” Even small formulation differences between brands can matter. It’s always worth a quick test with any new product, even within a familiar ingredient category.
“A patch test guarantees no reaction anywhere else on my body.” Not entirely — facial skin, for example, can sometimes be more reactive than the forearm. A clear patch test result is a strong, reassuring signal, but it’s not an absolute guarantee.
Final Thoughts
A skincare patch test takes only a few minutes to set up and one day to confirm, but it can save you from unnecessary irritation, discomfort, or wasted product. Whether you’re trying our Manuka Honey Tallow Balm for the first time or any new skincare product, this simple habit is one of the easiest ways to introduce new ingredients to your skin safely and with confidence.
Ready to try it for yourself? Shop our Manuka Honey Tallow Balm — and remember to patch test first.